Forms - Automation
Overview of items
Section 1. Named =Estimate Status- This is the first” Section” title in this form. This first section includes questions 2,3, and 4.
The following section in this form is (5) Install Date; this section contains two questions, 6 and 7.
Automation
In SolutionView, you set up triggers that automatically pull relevant products/solutions that can drastically improve your sales team's confidence that they are quickly providing the best viable options to customers.
Example of automation setup in the admin
Numbers were added to reference how it looks in admin (Fig.1) and in-app (Fig. 2)
Forms, as seen in the App.

Forms Conclusion Forms
Conclusion Section:
The “Conclusion” Section is an area where you can ask some final questions for your customer to ensure all bases are covered and the next steps for the appointment can be taken. In this example, we have “Estimate Status,” and I will click the pencil to edit that.
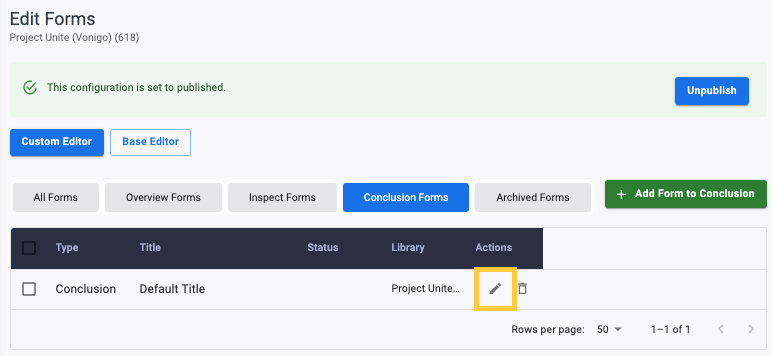
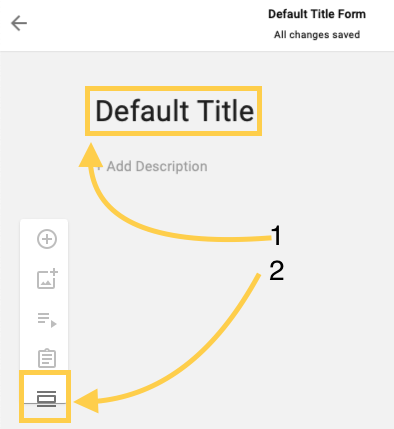
Conclusion Form View
1. As we see the title of the form up top
2. Estimate Status – this is the customizable title and, in this case, is a section of questions that were created that, as we can see, are related to the status.
3. Another section – as we see here with questions related to the installation date.

After making any changes to the forms, click the Save button at the bottom right of the page to ensure those changes are saved and ready to be published.

Forms Inspect Forms
Inspect Section:
The “Inspect” section is an area you can form for each area you want your team to inspect during an appointment. Examples of forms that can be built are basements, attics, exterior rooms, addon areas, garages, etc.
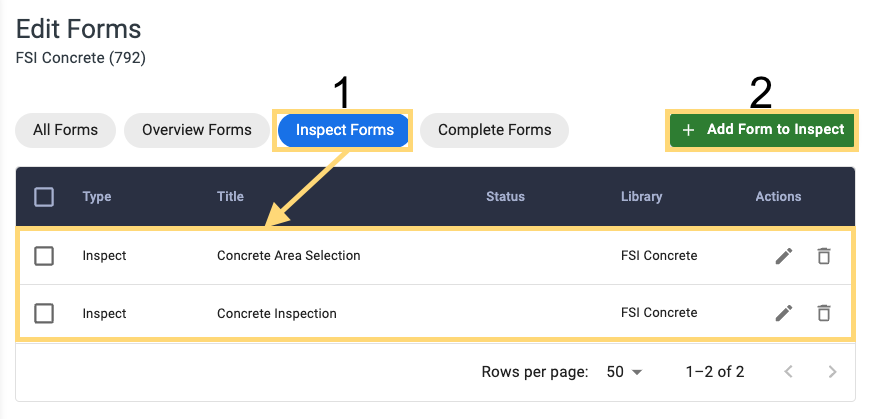
Reference Fig.1 below for the following items:
1. You can click the pencil in current forms for the” Inspect” section to make changes to that form. In this example, we have the options for” Additional Areas,” Walls,” and” Exterior that can be tailored.
2. + Add Form to Inspect – a new area of focus that you want the team can be created when this button is clicked
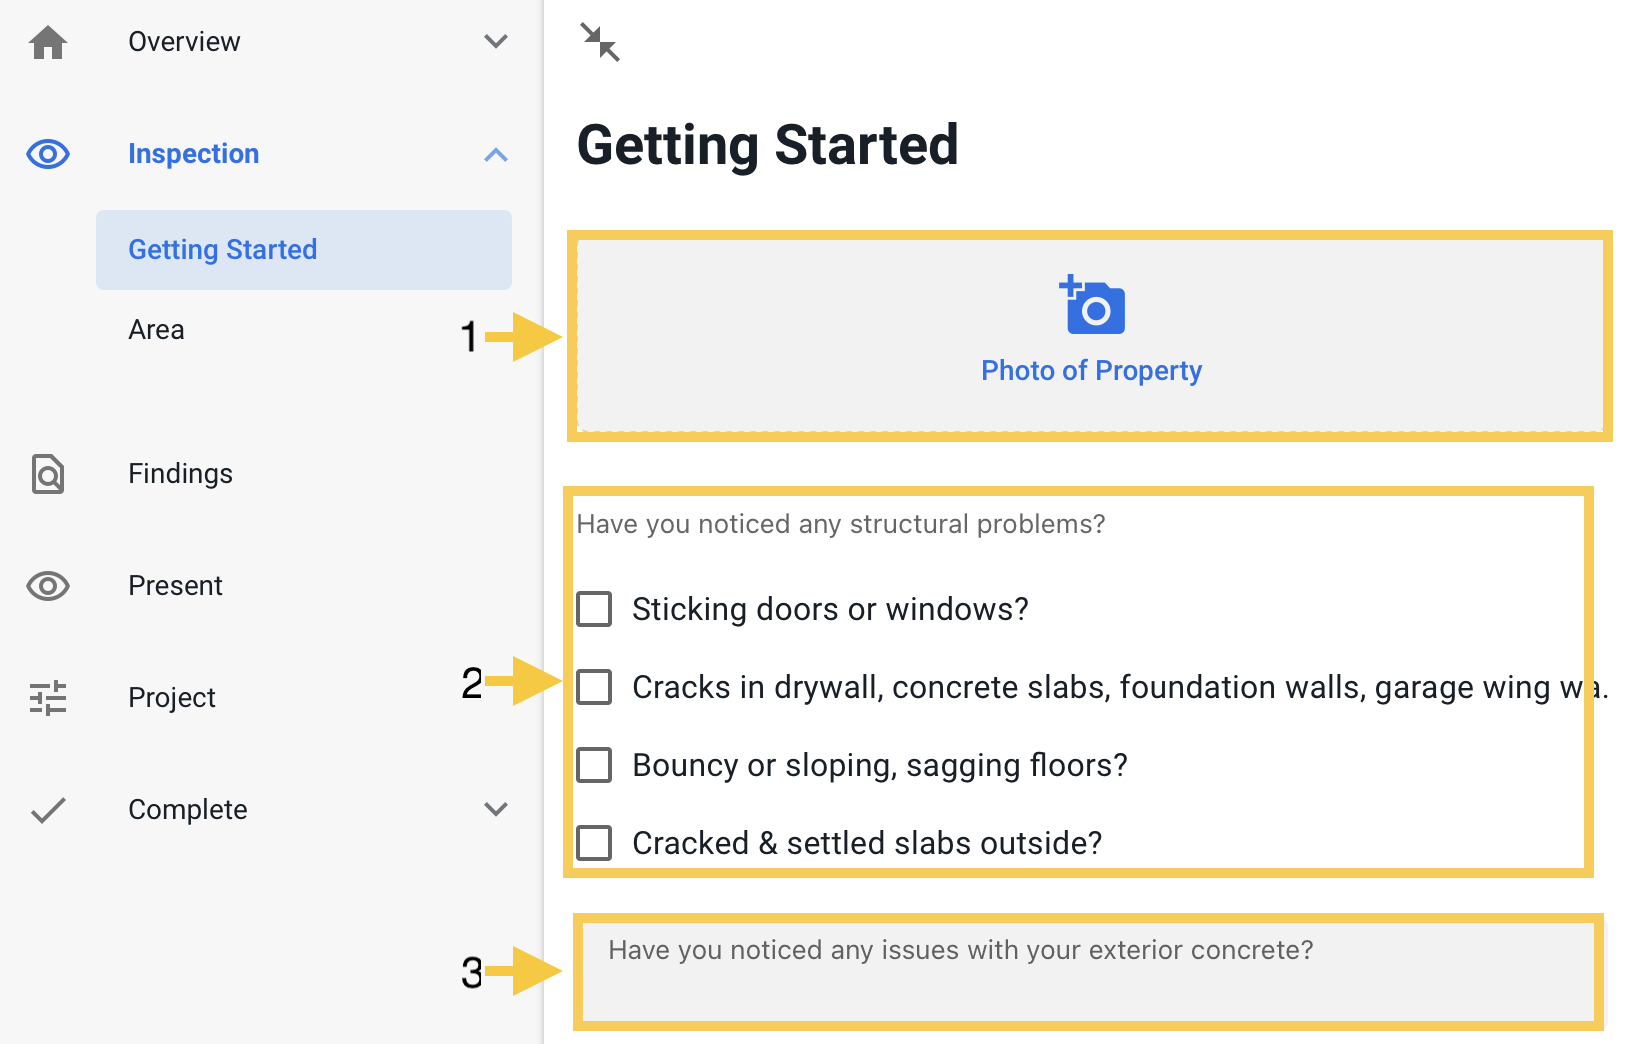
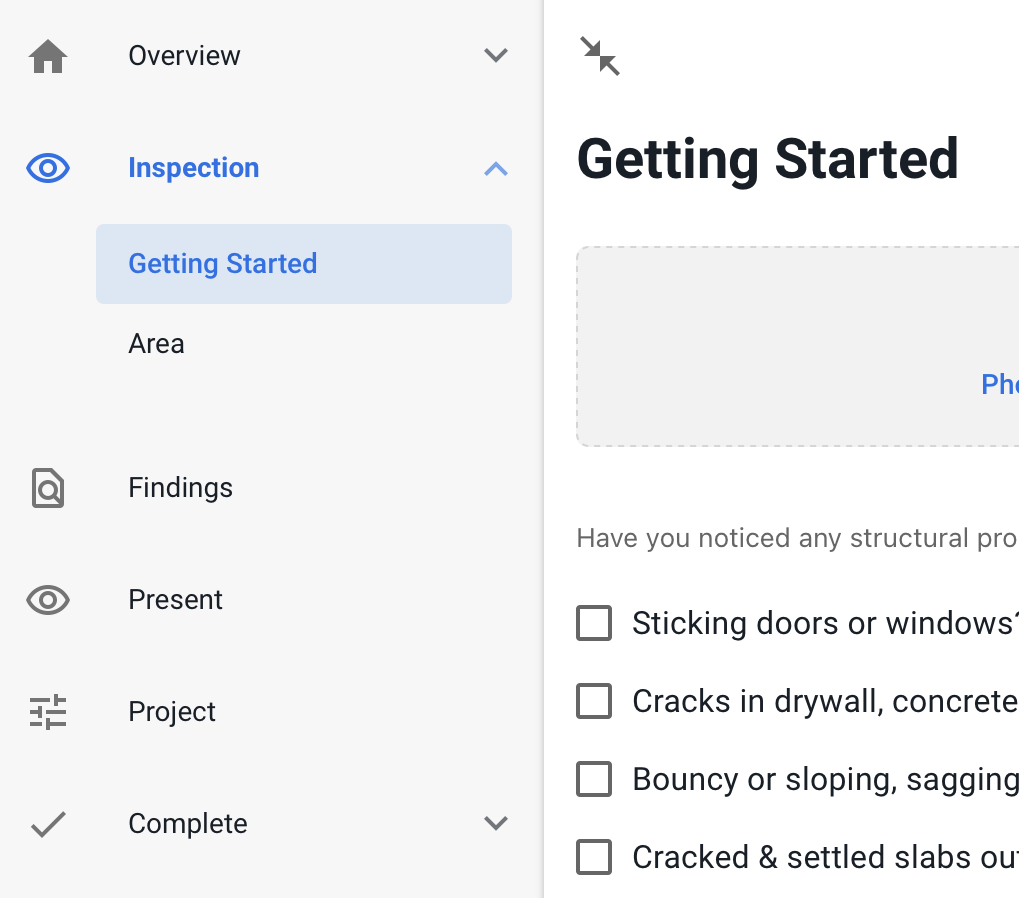
Inspect as seen in the App:
From the” Edit Forms” page above, we added some forms, and they are listed in the App as seen to the left. (After publishing) As you can see in the inspection section, not all forms are listed. Continue to next section to add other forms to the inspection:
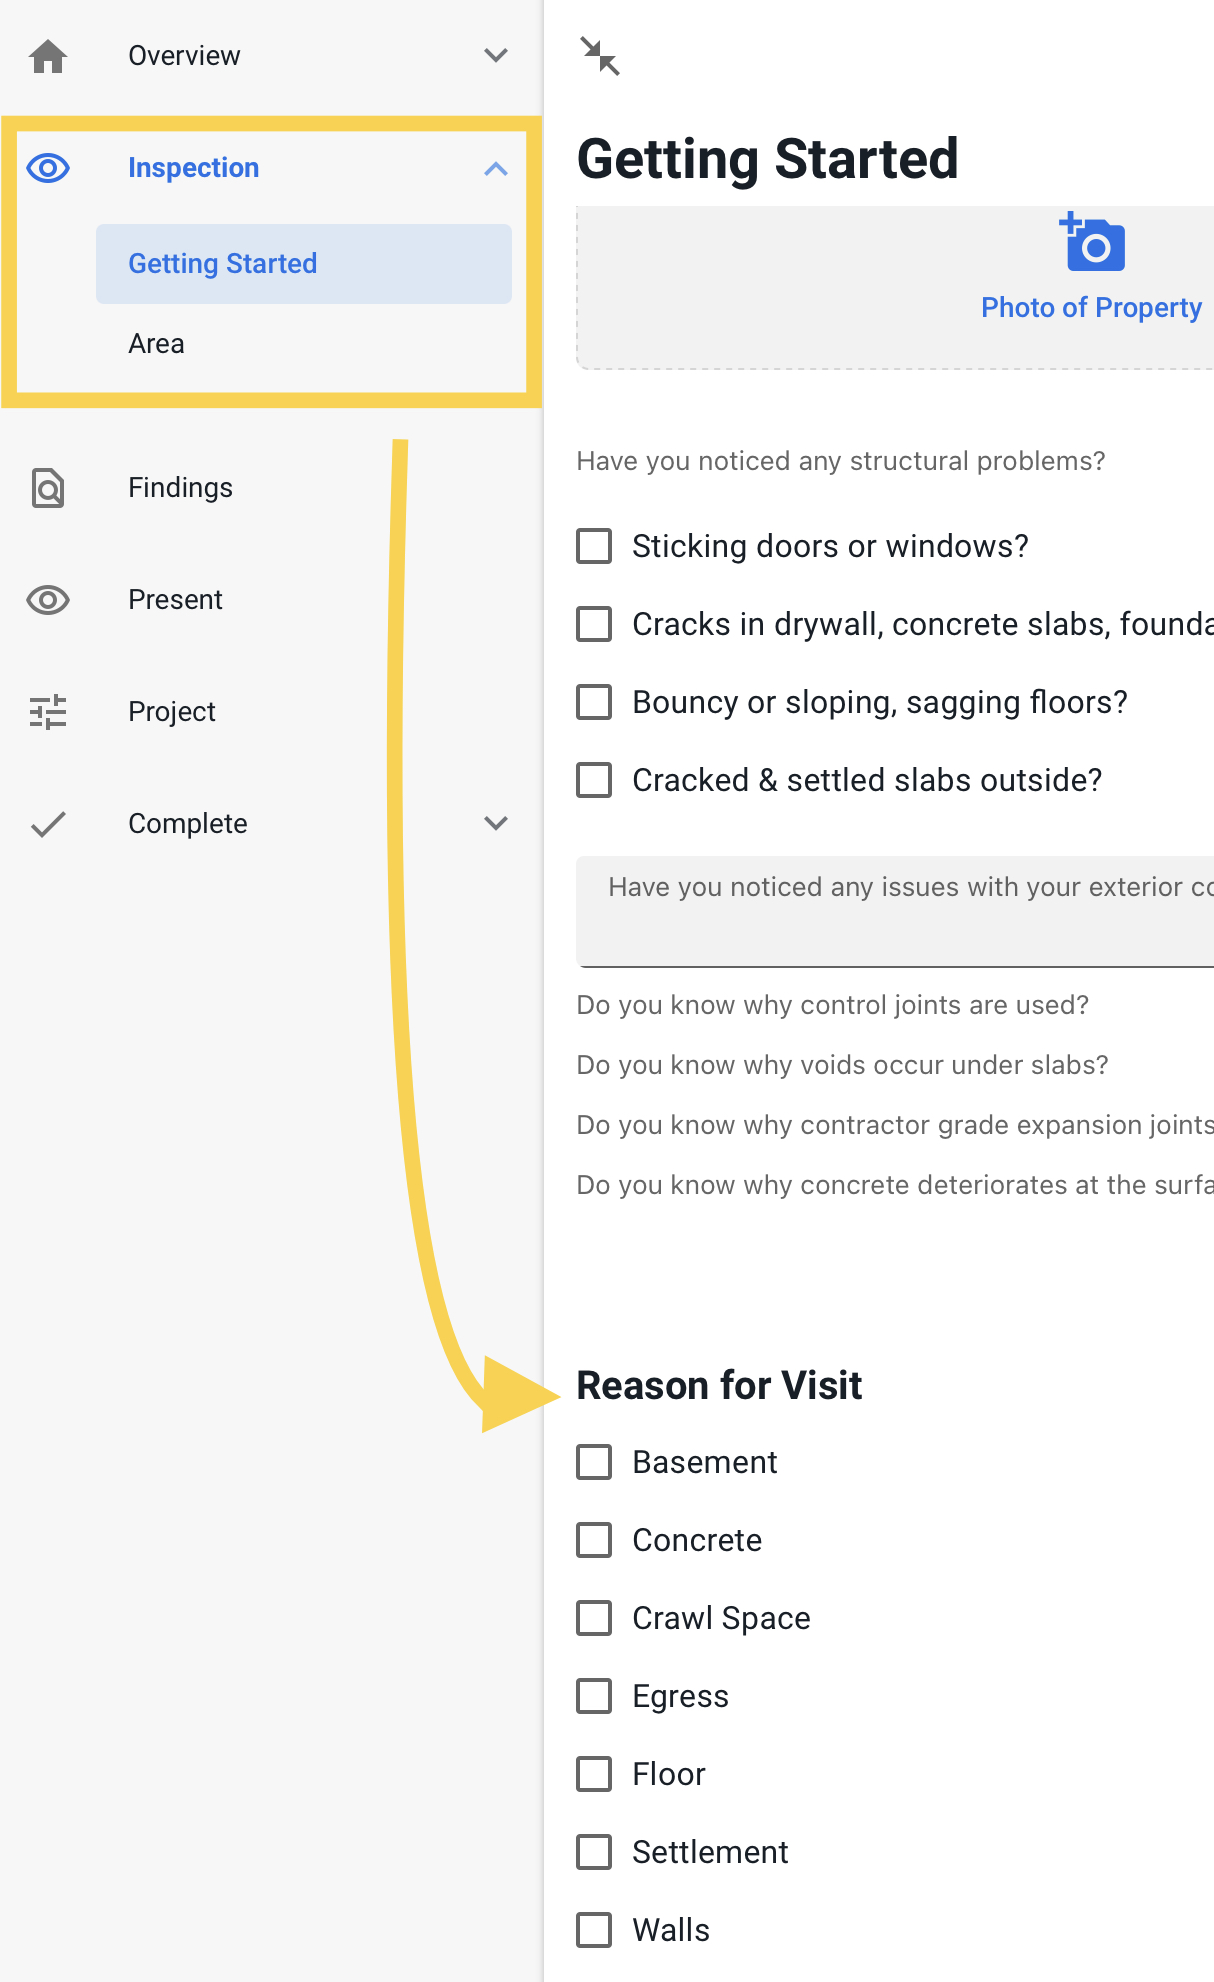
Adding Forms to Inspection
In the getting started section, clicking the needed items for reasons for the visit will add those forms to your inspection tab of forms to be completed during the appointment.
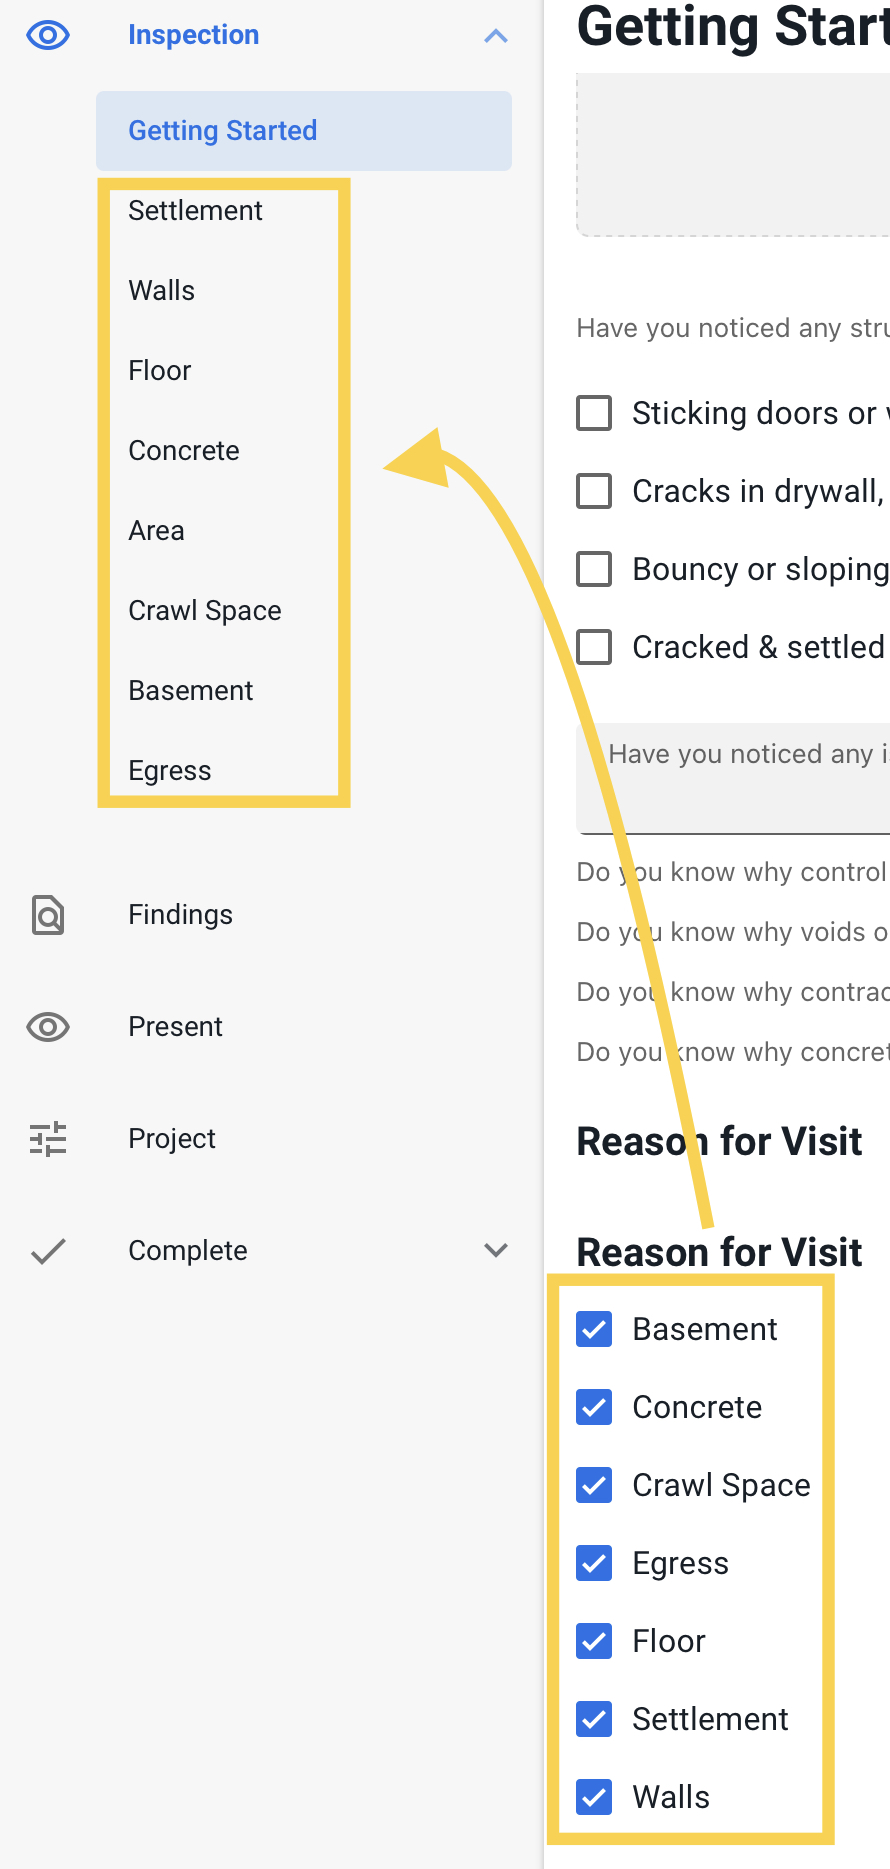
After checking the appropriate reasons for the visit, they will now be added to your inspection as seen below:
Forms Modification
Forms Editor to Building Forms
In the “Edit Forms” page, you will have the option to create custom forms for:
-Overview
-Inspect
-Conclusion
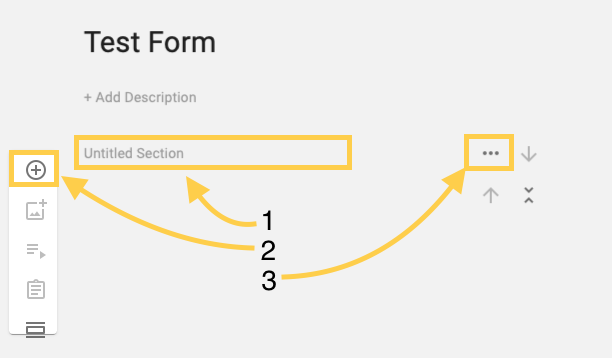
When you click the “+ form “on one of the above pages, the default form page will load
as seen to the right.
1. First, you will need to name the form
2. You will need to create a section of questions to ask. This will load a section labeled” Untitled
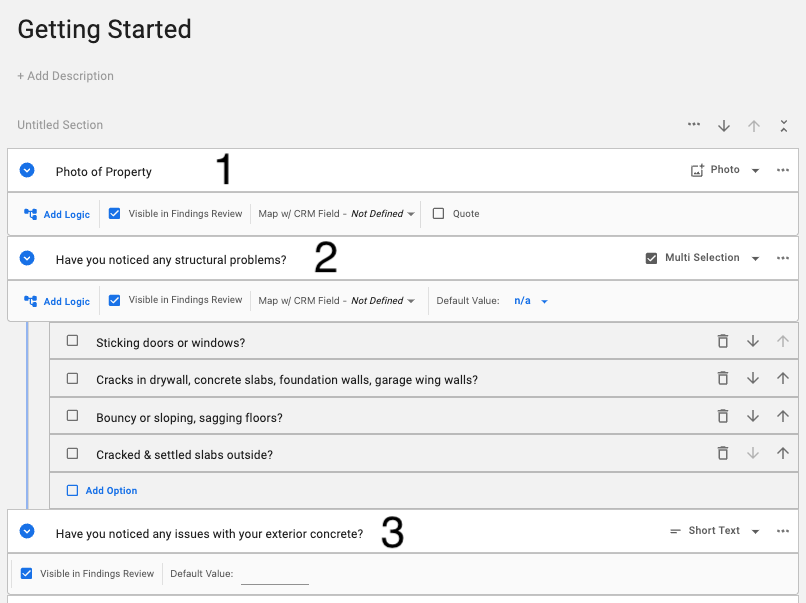
Adding questions to forms
(These three items will be covered below)
1. Untitled Section – Add the name preferred for that section of the question
2. Add –This button will allow you to select what type of question to add more detail in 2a below
3. Options – For this section, you can” Add Question” (more in-depth in 3a below) and delete this current section
A deeper dive into the above items above.
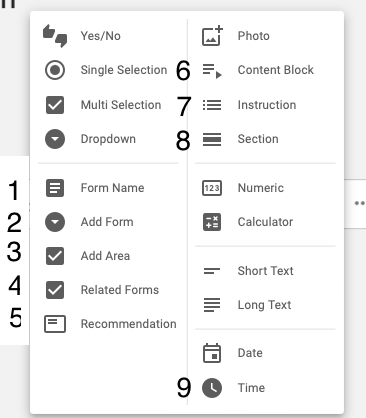
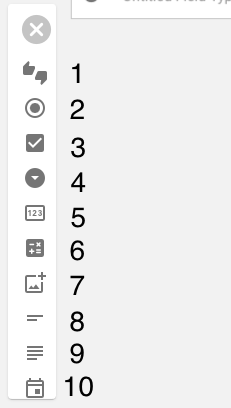
2a. Types of questions you can add
1. Yes or No
2. Single Selection - only one choice can be selected
3. Multi Selection - any choices that apply can be selected
4. Drop-down selection - only one option can be selected
5. Numeric - number field to be filled in
6. Calculator- built to your needs
7. Photo- Require an Image to be added/taken of the area
8. Short Text – a small description
9. Long Text – a more in-depth description field
10. Date Field – planning appointment time, installation, or whenever a date is needed
3a. Add Questions
When the add question is clicked, it brings up some new options that you can add to a section, the new items are numbered below, and everything else is the same as seen in 2a above.
1. Form Name – the specific name of this form you are currently creating
2. Add Form
3. Add Area – this allows us to create a new area of focus
4. Related Forms-
5. Recommendations – specifying which solution will the prod be added too
6. Content Block- Choose a video or photo to add that includes a description. (Optional checkbox to send to customer)
7. Instruction – Instruction for the sales team?
8. Section -
9. Time – Specify a time for an appointment or installation